.png)

Get Microsoft Team Site members and create a mailing list with Power Automate and Power BI
- Mara Pereira

- May 21, 2020
- 5 min read
Updated: Dec 1, 2020
Well, I must start by saying that, even though I’m doing this tutorial, this goes a bit against the idea of Microsoft Teams. But, every person/organisation has it’s needs right?
So here we are, going against all the logic behind Microsoft Teams and creating a mailing list to send a newsletter email to the members of our Team! We will be doing this using Power Automate mostly and also, of course, Power BI!
Key words: Power Automate, Power BI, Microsoft Teams, OneDrive
1) Building a flow to get our Team Members will be the first step. In the end we will have a Flow like the one below. To start building your Flow open Power Automate.

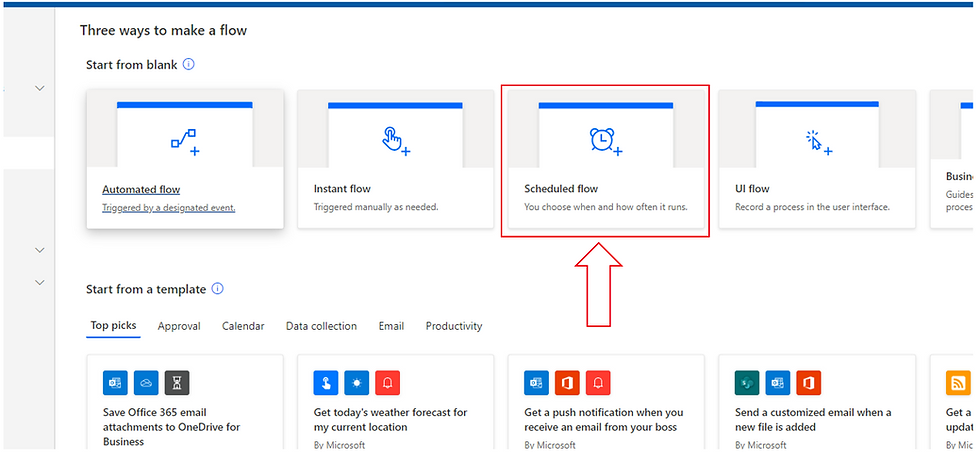
2) Click on “Create”:

3) In my case I wanted my Flow to update every day, so I chose the option “Scheduled Flow”. After choosing Scheduled Flow a popup window where you can set the name of the Flow and it’s frequency will show up. After you completed everything click on “Create”.

4) We will now create a new step that will list the Team Members of our Team Site.
To do this click on add new step, search for “List group members”. We will be retrieving the data from Office 365 Groups so make sure you choose the correct option!
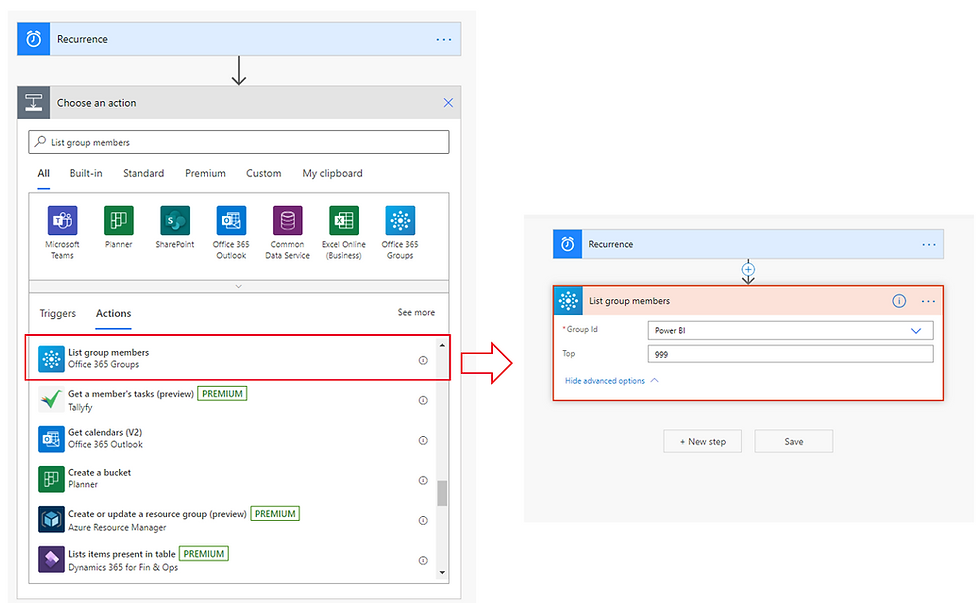
After choosing List Group Members from Office 365 Groups you just need to choose the Group ID (this drop down will give you the names of all the workspaces you have available).
Because your group might have more than 100 members, you might want to select “Advanced Options” and write 999 on the “Top” field. This will be the maximum number of members this Flow will be able to retrieve, so if your Team has more than 999 members you might want to look for some extra tricks online...
5) In the previous step we retrieve our information in JSON format. This is not very helpful to our cause… we must somehow get this data and put it into an Excel file on Onedrive… But first things first: let’s transform our data! For that we will have to add a step called “Initialize variable”. This step will transform our JSON data into a readable format for us to add it as a row in an Excel file later.
I know this all sounds a bit complicated but believe me, it isn’t 😉
After adding the step you should end up with something very similar to the image below. You can give any Name you want, but the Type should be Array and the Value should correspond to the field value you previously got as an output from the previous step.

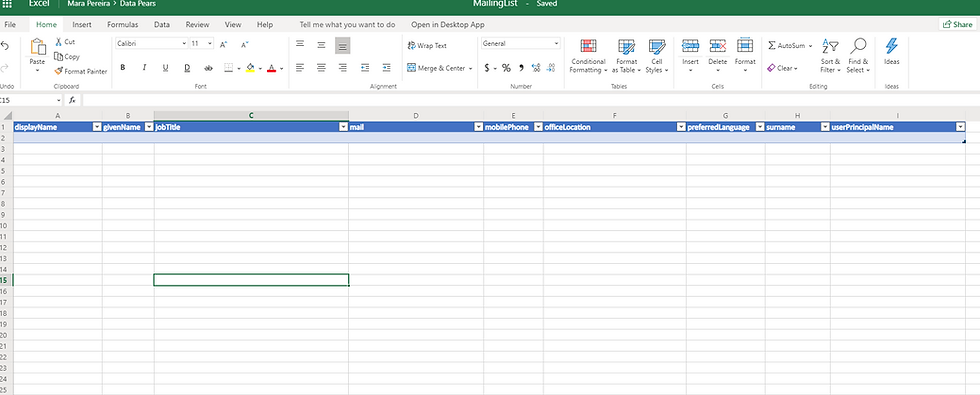
6) For this next step you will need an Excel file (xlsx) stored in OneDrive.
This Excel file must have the fields you want to retrieve from this Flow. In this case I did a little trick. I saved the JSON output and loaded that data into Power BI to verify the data I wanted to retrieve and how it would look like.
I ended up with this table as these were the only fields I was interested in:
Now, we don’t want to keep adding rows to our previous data, creating duplicate entries. To fix this and empty our table before updating it with the new data we first need to list all the rows we currently have in our table:

After doing this we will now delete all those rows by :
> Adding new step
> Choose Apply to each
> Select the variable you defined, in this case my variable was Members
> Add an Action
> Select “Delete a Row” action a
> Choose the correct location

7) Finally, we will add our updated list of members to our Excel table:
> Select Apply to each again
> Choose the variable Members
> Add an Action
> Choose Parse JSON
Here you will get a window like this one:

Power Automate is asking you for a Schema??? Where are we getting that from??
Good thing is you can Generate from a sample!
To get your sample you can run your Flow by testing it. When it’s finished running you can check the running history, open the Test you just ran and on the List Group Members step check the output. This should be enough to get you your schema. You should end up with something like this (you can use directly this code if you prefer):
{
"type": "object",
"properties": {
"@@odata.type": {
"type": "string"
},
"id": {
"type": "string"
},
"businessPhones": {
"type": "array"
},
"displayName": {
"type": "string"
},
"givenName": {
"type": "string"
},
"jobTitle": {
"type": "string"
},
"mail": {
"type": "string"
},
"mobilePhone": {},
"officeLocation": {
"type": "string"
},
"preferredLanguage": {},
"surname": {
"type": "string"
},
"userPrincipalName": {
"type": "string"
}
}
}

Our final step: Add a row into a table!

And there you go! You know have the list of your Microsoft Team Site members being updated automatically every day!
To get even more insights out of this you can now easily connect to your Excel file with Power BI and do a bunch of cool stuff!
This long tutorial is not over yet though! In my little project I wanted to know not only the emails of the members on my Team Site, but I also wanted to know how many knew users joined my Team Site after the last newsletter I sent.
This, of course, can be achieved using Power BI.
As we already have the hardest part done, this one was a lot easier to achieve.
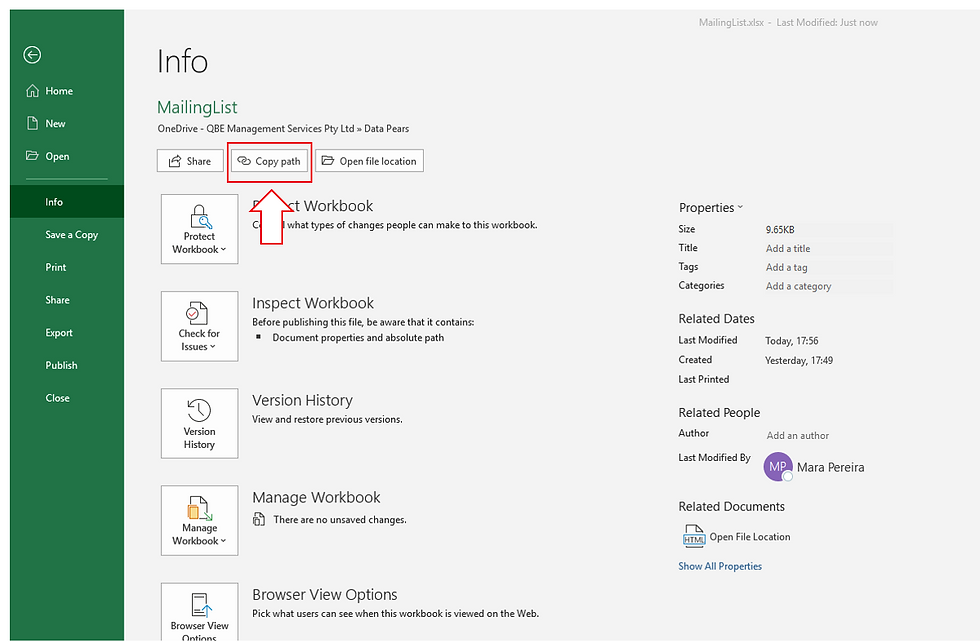
8) First, we will get the data retrieved by our new Flow. Open your .xlsx file on Excel Desktop. Once opened click on File, Info and click on Copy Path:
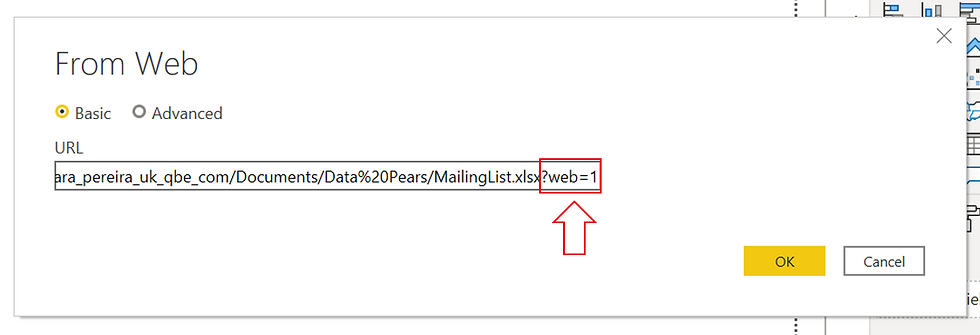
You can now open Power BI Desktop. Click on Get Data from Web and paste your .xlsx path.
Don’t forget to remove the last part of the URL!
Choose the “Organisational Account” login type and click on Load Data.
You now have you Team members list, always up to date with the help of Power Automate!
9) The first time I got the members from my Team Site I sent an email to them with my Power BI newsletter.
With that and my current list of users I can figure out how many new members I have in my Team since the last time I sent my newsletter to them!
Let’s get the list of emails I sent the first newsletter to!
❱ Click on Get Data and select Microsoft Exchange.
❱ You will be prompted to enter your email address, in this case I used my work email address
❱ In the Navigator choose the table Mail and click on transform data
❱ Once Power Query is opened with your table loaded filter the Folder Path column to show only “\Sent Items\”
❱ In the Subject column search for the newsletter email you sent to your Team Site members
❱ There is a column called BccRecipients (when I sent my email I added all the emails in Bcc). Remove all other columns so that you end up with just that one as your data table
❱ Next, expand the BccRecipients column to see the names and addresses
❱ Merge the Mail table with the Team Members table
❱ Add a conditional column to the team members table to check either the BccRecipients address column has a value. If the BccRecipients row is empty it means that at the time you sent the newsletter that user was not yet a member of your Team Site
And finally you can now build a report to keep track of the new people on your Team Site that will need to be added to your mailing list!
Pro tip: To make the process of getting the latest newsletter email recipients more efficient you can either define a parameter for the email subject if it’s different every month or, if your email subject will be always the same, you can add a filter in the Query Editor to get only the latest email sent with a specific Title.
This tutorial is mostly focused on the Power Automate part of the process hence the Power BI steps are not as detailed.
Hope you enjoyed this tutorial! Enjoy the sun folks! 😊


Is there an update on this? I have followed the power automate steps but it just times out when it goes to "Our final step: Add a row into a table!" No errors just times out. Any ideas on it? There are only 175 members so I dont think that is it.